
I was planning on finishing the CUCME topics before diving into CUCM but as luck would have it one of my ESX servers blew up so I had to reinstall my CUCM lab and as they say “when life gives you lemons, make a blog post about it.” So today we’ll look at how to install UCOS based servers (CUCM, CUC, CER etc) since the installs are so similar I will just show the publisher and subscriber install for CUCM, then we’ll look adding the servers to Prime Licensing, and we’ll close out with how to do a upgrade!
Making a Bootable ISO
Cisco doesn’t offer bootable UC ISOs on their support site, instead you can download OVA files from the Business Edition servers, the problem is that the OVA is preconfigured and probably isn’t running the latest and greatest version….however, you can instead download the upgrade ISO and use this handy trick to make the ISOs bootable!
Open UltraISO (after buying and installing it) and then open the CUCM image.
Note: I’m sure there are other solutions for this but I’ve always used UltraISO and this is my blog so we’re doing it this way!

Extract the isolinux.bin from the isolinux folder and save it somewhere handy.

Under Bootable click “Load Boot File” and select the isolinux.bin we just saved, then go back under that menu and check Generate Bootinfotable.

Then save the ISO as a new ISO, I tend to append bootable in the name. It can take a bit of time to save the image. Do this for all the UC images you want to install.

Installing CUCM Publisher
The install process itself isn’t that complicated for the publisher but we’ll go through it all anyway. You can choose to check the disk integrity or not, though sometimes the UltraISO messes up the MD5 so it is best to skip it.
The CUCM ISO actually includes Unity Connection as well but it will only let you select it if you create the VM with at least a 300 GB hard drive and 2 CPUs.

From there the installer asks you to confirm the install drive and asks if you want to install a patch (we won’t)


Pick the timezone you want for the server and accept the NIC questions unless you want to change your MTU etc.


For IP addressing, you will almost certainly use static IPs. I suppose you could use DHCP for a server in a lab but that really does seem like a bad idea.


The thought process for UC servers used to be to disable DNS unless needed because it removed a possible failure point so phones don’t have problems if DNS goes down. Nowadays features like Jabber rely on DNS so the thought process is closer to use DNS as long as it is resilient and redundant. We’ll use DNS because Jabber will make a blog appearance eventually.
The installer does verify A and PTR DNS records as it goes so you’ll want to create the DNS records before you get to far into the install.

Once the records are made, lets say yes to DNS and enter your DNS server and domain info.


Cisco UC servers have a platform admin user that is used to log into the OS level stuff like SSH, the OS Admin page, or Disaster Recovery page.
I tend to use “osadmin” as my username for it.

Next enter in the information that will be used to generate the server’s self signed certificates.

Since this is the first node we will answer yes to this.

Then we have to enter a NTP server, I tend to use my lab’s domain controller but you can use any reachable NTP server. The installer will not continue until it detects one though so you do need to make sure it can get time from somewhere.

The System Security password is used to add nodes to the cluster and is also used by the backup system.

If you want to enable SMTP from the OS level, you can enter a mail server if you have one.

Since this is a lab, we’ll disable Call Home since I doubt TAC will care if our lab blows up.

The Application user is what you use to log into the non- OS UC administration pages.
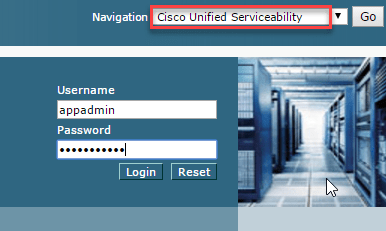
I tend to use “appadmin”

Lastly you’ll need to select Re-Initialize all, to wipe the disks and start the install.


Activating Services
By default most of the services on the CUCM service is disabled when the install is done.
So we need to activate the services if we want the server be useful at all.
Go to the server IP and navigate to Cisco Unified Serviceability.
Then go to Tools -> Service Activation

Since this is just a lab we’ll just pick Check All Services and save, in a real multi-node deployment you might choose to be more selective about which services are activated on which server.

Installing CUCM Subscriber
Before we start the subscriber install we need to define it in the Unified CM Administration.
Log in and go System -> Server
Then click Add New.


Pick CUCM Voice/Video and then click Next.

Then add the DNS name of the upcoming server, you can also put a description as well if you so choose. The MAC Address field is just informational and doesn’t do anything.

The actual install is largely the same until we get to this question again, this time say no.


You can optionally pause the install if you want to complete it later but we’ll pick no so we get immediate gratification.

Then enter in the publisher’s hostname, IP address, and the security password.
The rest of the install is more or less the same from here on out, you’ll have to activate services on the subscriber as well.

Licensing
When you install a UC server it comes with a 60 day or so evaluation license but for fun let’s add the CUCM server to my Prime Licensing server.

Under Product Instances click Add and enter the information for the publisher, the subscriber is not added to the license server.

Once it is added you can click synchronize now to see if all licensing is happy.

You can view the license usage by looking under License -> License Usage

Upgrading
As a bonus let’s look at how to upgrade a UC server, I’m doing this on my Unity Connection server but it is the same process for any UCOS based server.
Under Cisco Unified OS Administration go to Software Upgrades -> Install/Upgrade

In my case I have mounted the new ISO in VMware like so

So I will use the DVD option however you can use a SFTP server if you prefer.


Lastly we tell the wizard whether or not to boot to the new upgraded partition.

